Branches
What is Git Branch?
Default branch will be created either master or main depends on the settings.
Branch is an independent line of development work. As an example, if you are working on a large project and you want to add a new feature, you can't commit all your changes straight away and push them to the default branch, since that would make the commit history pretty messy and it would be hard to tell which changes were made.
Regardless of how big or small your changes are, always create a branch and work on it to encapsulate your changes.
All new commits you make to that branch will be recorded in that branch as well.
Git branch commands
Create branch
git branch <branch-name>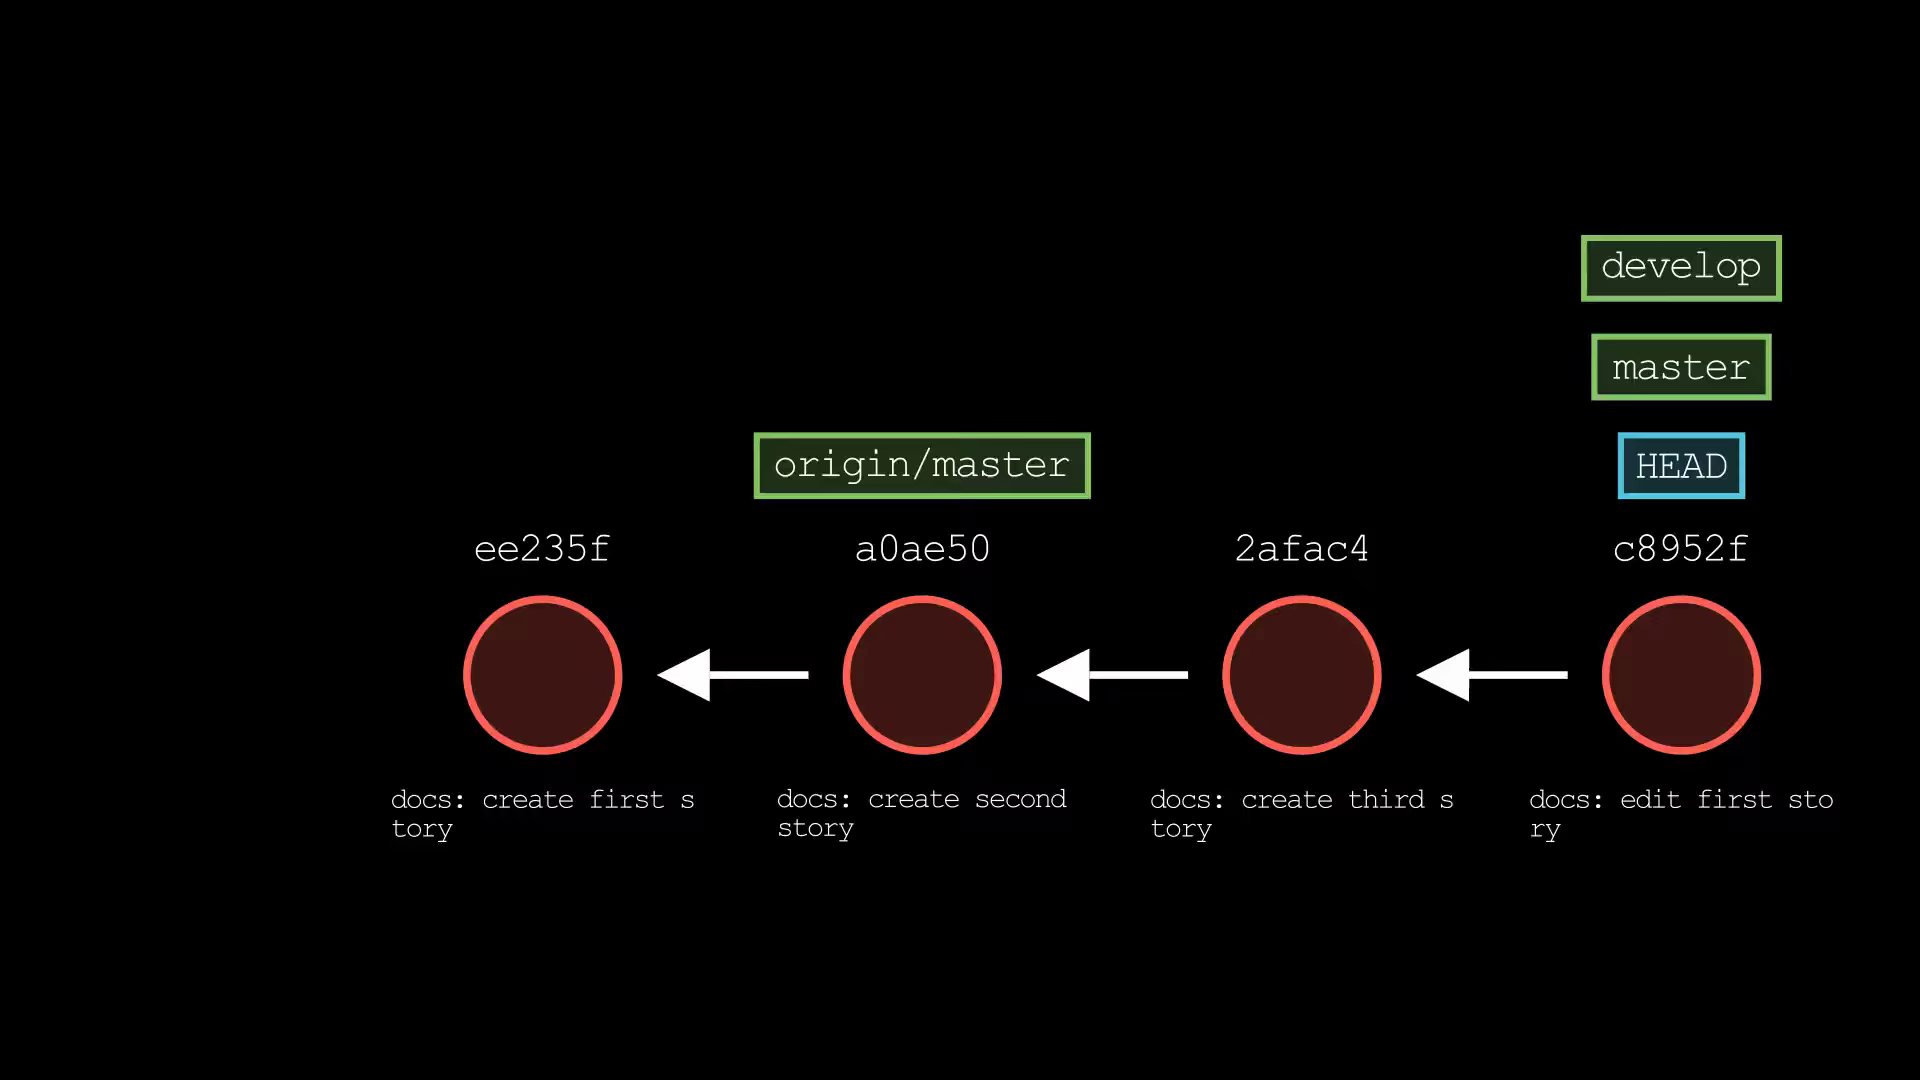
Checkout/Switch branch
Remember that the HEAD is Git's way of referring to the current snapshot
Once we have created the branch, we have to switch or checkout to that branch.
- the default branch can still proceed with the commits even though we have checkout to develop branch
git checkout <branch-name>
# if the branch name is not exists, it will auto create and checkout to that branch
git checkout -b <branch-name>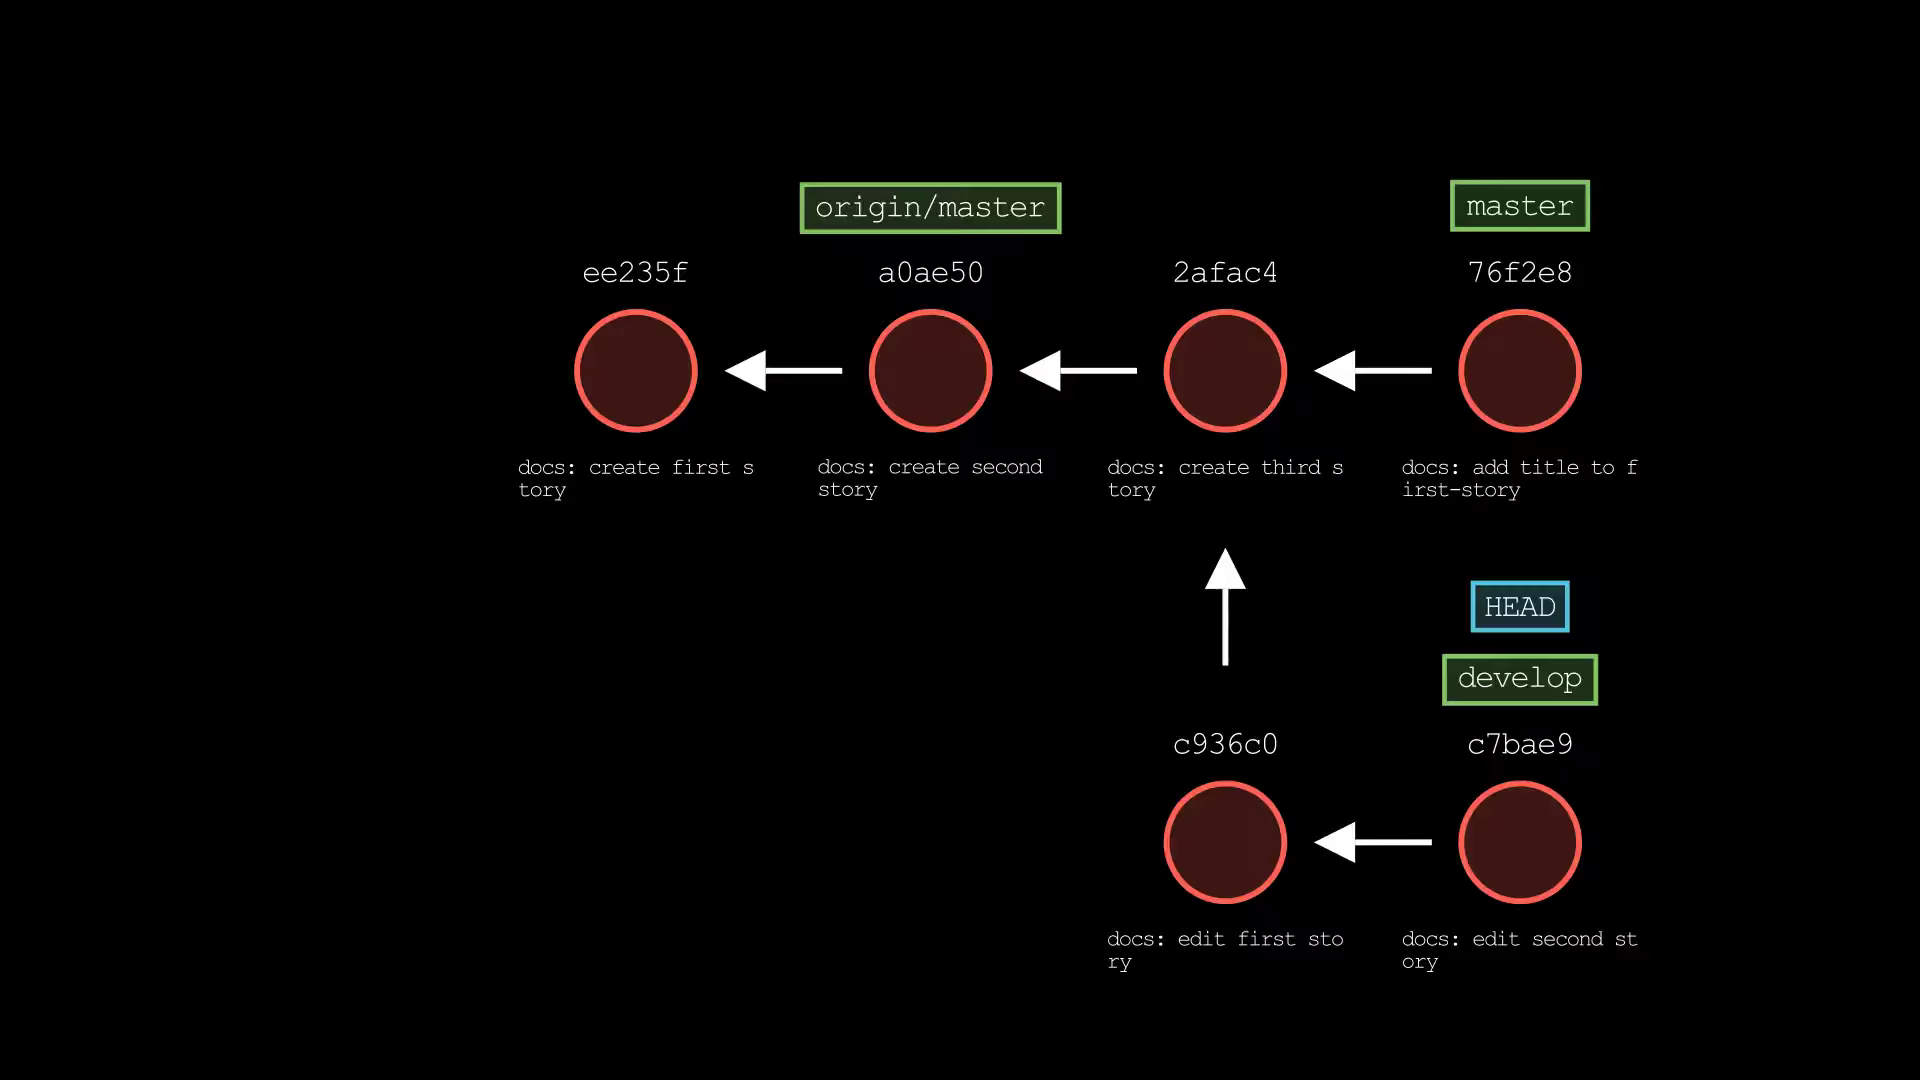
Merge branch (Fast-forward)
The git merge command will combine two branches, so it will consolidate multiple commit sequences into a single history.
Here is the scenario, since develop branch came directly from main and no other changes had been made to main, so it can fast-forward.
git merge <branch>

# example, if you want to merge develop branch to main
git checkout main
git merge develop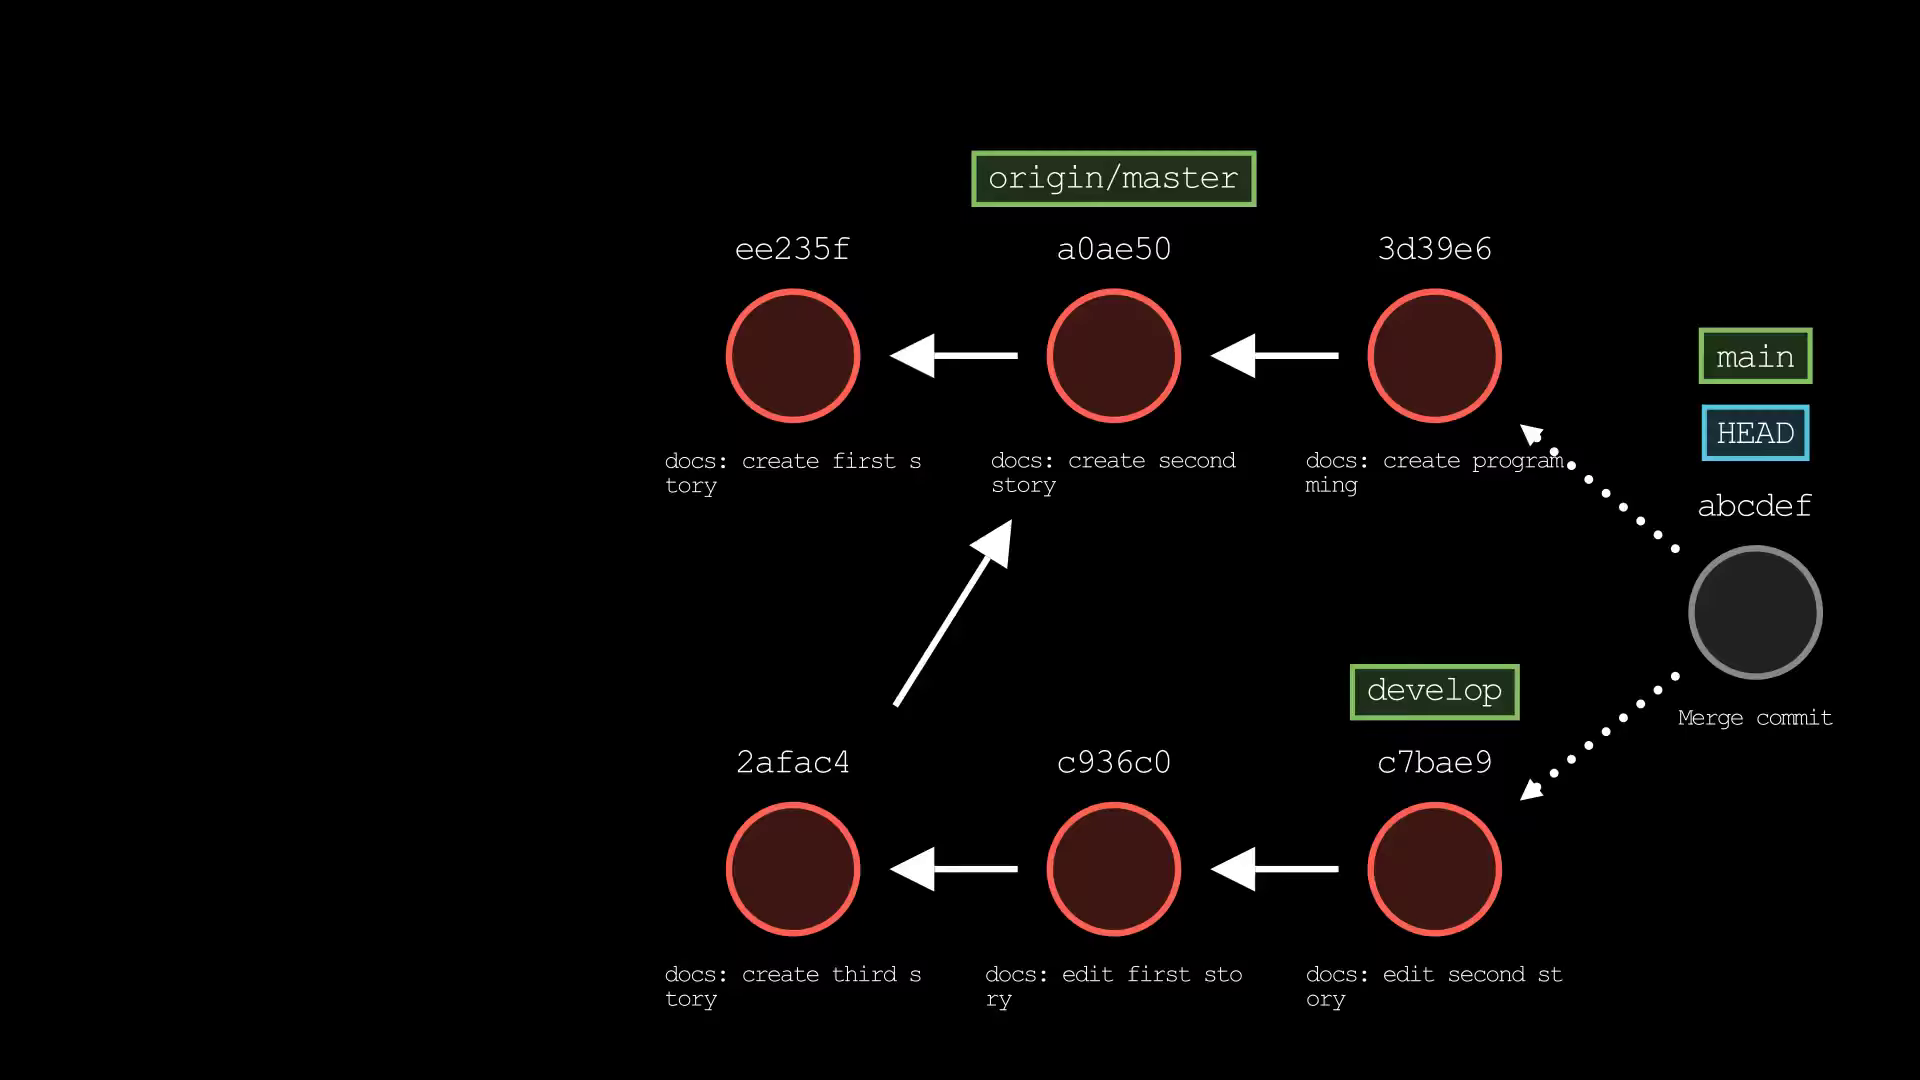
Merge conflicts
A merge conflict will arise when two developers have changed the same lines in a file. Because of that, Git does not know which one is correct.
To resolve merge conflict, you have to open the file to make necessary changes. Then, use git add command to stage the new merged commit and the final step is to merge your latest commits into it.
git add <file-that-has-conflicts>
git commit -m "merged with <branch> after fixing conflicts"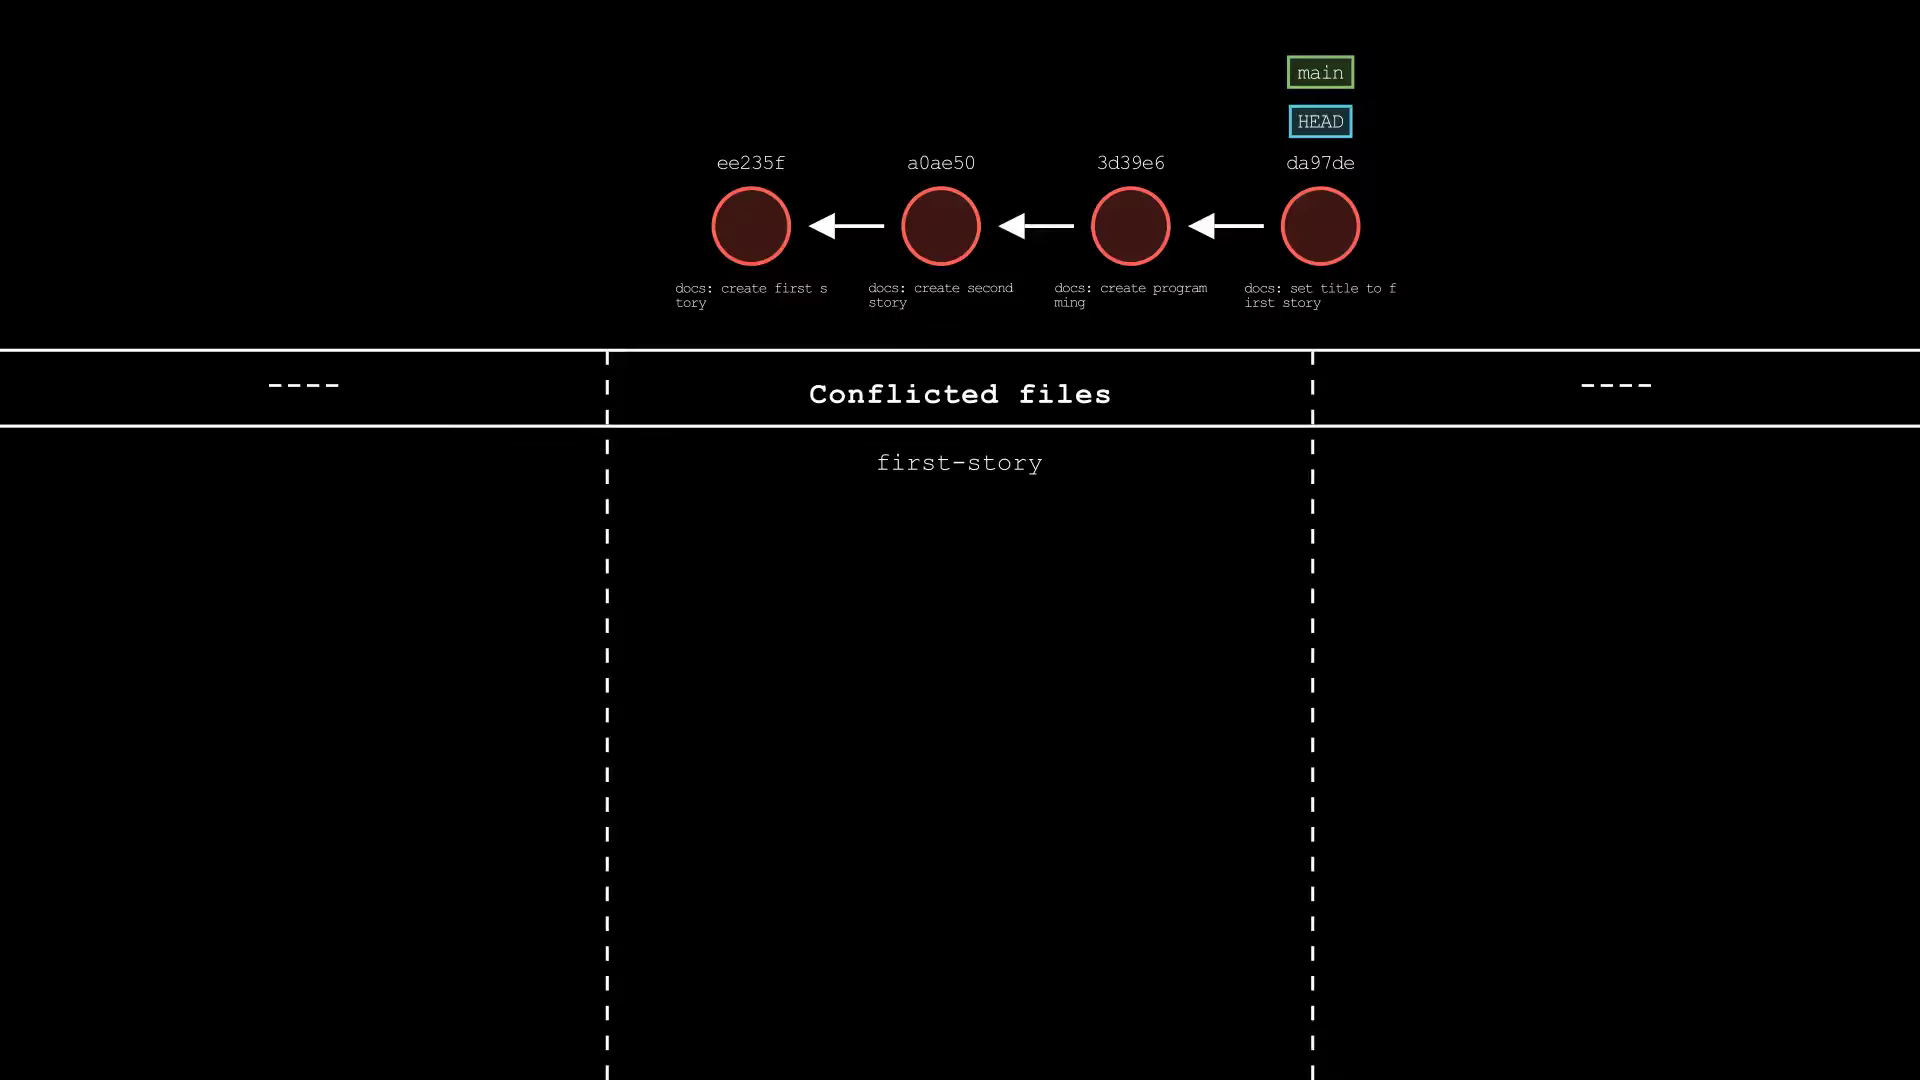
List branches
git branch
git branch -a # list all local and remote branches
Delete branch
git branch -d <branch-name> # delete branch with safe operation
git branch -D <branch-name> # force delete branch
Rename branch
git branch -m <branch-name> <new-branch-name>
git branch -M <branch-name> <new-branch-name> # force rename branch
Create remote branches and push
Before we want to push our local branches to our remote repository. The remote repository needs to be added to our local project if it hasn't already been. Normally the remote name is origin, but you can change it.
git remote add <remote-name> <remote-repo-url>
# example
git remote add origin https://github.com/KarChunT/git-training
Once you initialize, you have access to this remote repository. So you can push your local branch to the remote at remote name.
- The reason why we need to set-upstream from local to remote is because it makes our jobs easier when we want to perform push and pull operation. With an upstream branch set, you can simply
git pullorgit pushinstead ofgit push origin <branch>
What is upstream?
An upstream is just a remote tracking branch that is associated with your local branch. Do take note that, each branch only has one upstream.
# set-upstream, push the local branch to the remote at remote name
git push -u <remote-name> <local-branch-name>
git push <branch-name> # after you set up-stream, branch-name is optional
git push --force # force push, will overwrite the things in remote

# example
git push -u origin develop
You can use the following command:
- if the remote branch already exists or
- you want to change upstream branch
git branch -u origin/<branch-name>Last updated on