Kubernetes Architecture
Cluster Architecture
Each Kubernetes cluster has a master node (control plane) and one or more worker nodes. It's responsible for managing the cluster, while the worker nodes (Nodes) are responsible for hosting application as containers and running the applications.
Kubernetes supports other runtime engines that adhere to the OCI standards, like containerd or Rocket, so it is not necessary to install Docker before installing Kubernetes.
Here is an overview of Kubernetes cluster.
- The cluster has master and worker nodes, both serve different purposes.
- Master node
- ETCD Cluster is used to store information regarding the cluster.
- kube-controller-manager is used to manage various controllers, each controller, each controller has different functions to take care of its side.
- kube-scheduler is used to identify and schedule the pods on nodes. It only decides which pod goes to which node.
- kube-apiserver is used to orchestrate (manage) all cluster operations and it's the primary management component in Kubernetes which acts as the frontend to the cluster.
- Worker node
- kubelet is used to register the node with the kube-apiserver. It will create the pod on the node when it receives the instructions from the kube-apiserver, and monitor the node and container/pod state.
- kube-proxy is used to create appropriate routing rules when a new service is created to establish communication between containers via services within the cluster.
Cluster
A cluster is a set of nodes grouped, with multiple nodes within a cluster, it can help to distribute or share the workload as well. As a result, your application will still be accessible even if one of the nodes fails.
Nodes
A node is a worker machine, it can be either a physical or virtual one depending on the Kubernetes cluster. Each of the node is managed by the control plane (master node) and a node can have multiple pods within it. This is where containers will be launched by Kubernetes.
Master node (Control Plane)
Master node can be hosted in the form of containers.
A master node is a node that is responsible for;
- managing the cluster
- managing, planning, scheduling, and monitoring the nodes
- storing the information regarding the cluster such as nodes, pods, configs, etc
- transferring the workload of the failed node to another worker node
These tasks are performed by the master node through a set of components known as the control plane components.
- ETCD Cluster
- kube controller manager
- scheduler (kube-scheduler)
- kube-apiserver
ETCD Cluster
ETCD is a distributed, reliable key-value stored database to store information regarding the cluster such as the nodes, pods, configs, secrets, accounts, roles, bindings, and others in a key-value format (JSON).
- cluster configuration data
- secrets and state information
- certificates and keys
All information you see when you run the kubectl get command is from the ETCD server. Remember all changes made to the cluster like adding additional nodes, deploying pods, etc, will be updated in the ETCD server.
There are two ways to deploy ETCD in Kubernetes environment.
-
Manual installation
- ETCD releases
- ETCD installation instructions
--advertise-client-urls 'http://{IPADDRESS}:2379'= This is the address that ETCD listens,2379is the default port of ETCD listens.kube-apiserverwill use this URL when trying to connect to ETCD, so this URL has to be configured on kube-apiserver configuration file.
-
kubeadm
 Normally, we set up our cluster using
 kubeadmtool, thekubeadmtool will auto-deploy the ETCD server as a Pod in thekube-systemnamespace. Of course, you canexecinto that pod to use theetcdctlcommand.kubectl exec etcd-controlplane -n kube-system -- etcdctl get / --prefix --keys-only. With this command, you can get all keys stored by Kubernetes, you will notice the root directory is the registry, and below that are various Kubernetes objects like nodes, pods, deployments, etc, as it stores data in a specific directory structure.
Kube Controller Manager
The kube controller manager manage various controllers in Kubernetes, for example;
- node-controller
- replication-controller
- namespace-controller
- deployment-controller
- endpoint-controller
- job-controller, etc
The controller is a process that is responsible for monitoring the state of various components and resolving situations as necessary to the desired state. There are two ways to deploy kube controller manager in Kubernetes environment.
-
Manual installation
-
kubeadm
- Similar to above, we can use
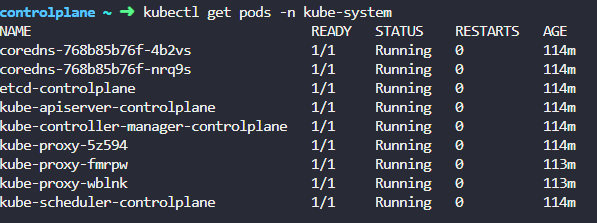
kubectl get pods -n kube-systemcommand to find the kube controller manager pod. - Run on control-plane (master node)
- If you want to see the kube-controller-manager pod config options, then you have to
cat /etc/kubernetes/manifests/kube-controller-manager.yaml. - If you want to see the kube-controller-manager service options, then you have to
cat /etc/systemd/system/kube-controller-manager.service. - If you want to see the kube-controller-manager running process, then you have to
ps -aux | grep kube-controller-manager.
- If you want to see the kube-controller-manager pod config options, then you have to
- Similar to above, we can use
Node-controller
The node controller monitors node status and takes necessary action to ensure that applications are running through the kube-apiserver.

Nodes are tested every 5 seconds to ensure the node is healthy by the node controller. After 40 seconds of not receiving heartbeats from a node, it marks the node as unreachable. The system gives a node 5 minutes to return after it has been marked unreachable. As a result, if the PODs are part of a replicaset, those pods will be removed from that node and will be provisioned those pods on the healthy nodes.
Replication-controller
The replication controller monitors the replicaset status and takes necessary action to ensure that the desired number of PODs are available at all times within the replication group. The POD creates a new one if it dies.
Kube Scheduler
It only decides which pod goes to which node.
Additional add-on:
- Taints and tolerations
- Node Selectors
- Node Affinity
The kube scheduler identifies and schedules the pods on nodes based on the pod resource requirements, but it does not place the pod on the nodes. The kubelet is the one who will place and create the pod on the node.
The reason why we need a scheduler is because there could be different sizes of nodes and pods. You will need to ensure that the node has sufficient resources so that the pod can proceed. Therefore, each pod is analyzed by the scheduler to determine the best node.
Here is an example, currently we have one pod with CPU requirements of 10. The kube scheduler will be going through 2 phases to identify and schedule the pod on the best node.
- The kube scheduler will filter out those nodes that do not fit the requirements. So in this case, node 1 will be filtered out as node 1 only has 4 CPUs.
- (Rank nodes) By using a priority function or class, the kube scheduler assigns a score and calculates how much free space is available on the nodes after the pod is placed. The highest score after calculation will place the pod on that node.
- Assuming the priority score is 5
- Score on node 2 =
10 - 5 = 5 - Score on node 3 =
20 - 5 = 15(Win)
- Score on node 2 =
- Assuming the priority score is 5
There are two ways to deploy kube scheduler in Kubernetes environment.
-
Manual installation
-
kubeadm
- Similar to above, we can use
kubectl get pods -n kube-systemcommand to find the kube scheduler pod. - Run on control-plane (master node)
- If you want to see the kube-scheduler pod config options, then you have to
cat /etc/kubernetes/manifests/kube-scheduler.yaml. - If you want to see the kube-scheduler running process, then you have to
ps -aux | grep kube-scheduler.
- If you want to see the kube-scheduler pod config options, then you have to
- Similar to above, we can use
Kube API Server
It orchestrates (manage) all cluster operations. The Kubernetes API is exposed for external users to manage the cluster, as well as for the controllers to monitor the state of the cluster and make the necessary changes, and for the worker nodes to communicate with the server.
In Kubernetes, the kube-apiserver is the primary management component, which acts as the frontend to the cluster, that means all internal (controller-manager, ETCD, kube-scheduler, kubelet) and external communication to the cluster is via the kube-apiserver component.
All the kubectl commands will first reach to the kube-apiserver. There are some steps that kube-apiserver to go through. These 3 steps normally are for kubectl get <something>.
- Authenticate the request
- Validate the request
- Retrieve the data from ETCD cluster and returns the requested information
# Reference: https://kubernetes.io/docs/reference/kubernetes-api/workload-resources/pod-v1/
curl -X POST /api/v1/namespace/default/pods
Of course, you can interact with kube-apiserver by calling the API directly instead of using kubectl command. Here is an another example of creating a pod.
- Authenticate the request
- Validate the request
- Retrieve the data from ETCD cluster
- Create a Pod Object without the node assign, update the information in the ETCD server, and return the information (Pod has been created) back to the user
- The scheduler will identify and schedule the pod on node by monitoring the kube-apiserver and return the information back to kube-apiserver. After that, the kube-apiserver will update the information in the ETCD cluster
- The kube-apiserver will send that information to the appropriate worker node in the kubelet
- The kubelet will create the pod on the node and tell the container runtime engine to deploy the application image.
- After everything is completed, the kubelet will update the status back to the kube-apiserver and the kube-apiserver will update the information in the ETCD cluster
All these steps are very similar when every time a change is requested and the only component that directly interacts with etcd is kube-apiserver. Scheduler, kube-controller manager, and kubelet use the kube-apiserver to perform updates in their respective areas of the cluster.
There are two ways to deploy kube-apiserver in Kubernetes environment.
-
Manual installation
-
kubeadm
- Similar to above, we can use
kubectl get pods -n kube-systemcommand to find the kube-apiserver pod. - Run on control-plane (master node)
- If you want to see the kube-apiserver pod config options, then you have to
cat /etc/kubernetes/manifests/kube-apiserver.yaml. - If you want to see the kube-apiserver running process, then you have to
ps -aux | grep kube-apiserver. - If you want to see the kube-apiserver service, then you have to
cat /etc/systemd/system/kube-apiserver.service
- If you want to see the kube-apiserver pod config options, then you have to
- Similar to above, we can use
Worker node (Workers)
kubelet
The kubelet is an agent that runs on each node in the cluster. It will register the node with the kube-apiserver when it exists in worker node. It will listen the instructions from the kube-apiserver, when it receives the instructions to deploy a container or pod on the node, it will create the pod on the node and tell the container runtime engine to pull the required image and run as an application instance. Lastly, after everything is completed, the kubelet will update the status back to the kube-apiserver and the kube-apiserver will update the information in the ETCD cluster.
Besides, the kube-api server retrieves kubelet status reports periodically to monitor the node and container/pod state. Lastly, kubelet ensures a specific number of pods are available on a single node.
Summary;
- Register node
- Create Pod
- Monitor node & PODs
By default, kubelet is not automatically deploy by kubeadm tool. So, you have to install it manually on the worker nodes. Refer to this link for kubelet installation.
- Deploy
kubeletas a pod is not a good practice, as thekubeletis designed to run as a system service on each node (host) in the Kubernetes cluster. This will ensure that thekubeletcan manage the lifecycle of pods and containers on the node without any dependencies on the Kubernetes control plane.
If you want to see the kubelet running process, then you have to ps -aux | grep kubelet. Remember the default kubelet configuration file normally is located at /var/lib/kubelet/config.yaml and /etc/kubernetes/kubelet.conf. This file /etc/kubernetes/kubelet.conf is used by the kubelet to authenticate with the kube-apiserver.
kube-proxy
It is a network proxy that runs on each node in the cluster. It maintains network rules on nodes. These network rules allow network communication to your Pods from network sessions inside or outside of your cluster (nodes can communicate with internal and external).
Every pod can reach other pods within a Kubernetes cluster by deploying a pod networking solution. A pod network is an internal virtual network connecting all nodes in a cluster so that the pods can communicate with each other. In this example, assuming Pod 1 is an API application and Pod 2 is the database. Pod 1 can access Pod 2 using the Pod 2 IP address, but the Pod 2 IP will not be guaranteed the same as always.
So, we have to create a Kubernetes service object that exposes the database across the cluster, which means Pod 1 (API application) can access Pod 2 (database) by using the service name and the service will also assign an IP address.
But how does the service get its IP address? Does the service join the same pod network as well?
Unfortunately, it does not join the pod network. Here is the explanation.
- Service objects are not actually objects: they have no interfaces or active listening processes, and they are virtual components within Kubernetes that only live in memory, so they cannot join the pod network.
However, we also stated that the service should be accessible from any node in the cluster. With the help of kube-proxy, we can achieve that. Each node in the Kubernetes cluster runs Kube-proxy, which looks for new services and creates appropriate routing rules on the worker nodes to forward traffic to the new services to pods whenever a new service is created. It will ensure that the containers can talk to each other via services within the cluster.
This can be done through IPTables rules. It will create an IPTable rules on each node in the cluster to know that the Database service is actually point to Pod 2 (database), 10.106.0.3 ---> 10.106.0.2. This is how kube-proxy configures a new service.
How to deploy kube-proxy?
- kubeadm
- Similar to other Kubernetes components, we can use
kubectl get pods -n kube-systemcommand to find the kube-proxy pod. - Do take note that, kube-proxy is actually deployed as a Daemonset, so the kube-proxy pod will always be deployed on each new node in the cluster.
kubectl get daemonset -n kube-system
- Similar to other Kubernetes components, we can use
Last updated on