Problem Solving
Edit hostname on Ubuntu
-
Edit
/etc/hostnamesudo nano /etc/hostname -
Replace any hostname you like. Save the file.
/etc/hostnamehello-laptop -
Reboot the system
sudo reboot -
Check your hostname
hostname
Fix docker-compose ERROR: max > virtual memory areas vm.max_map_count [65530] is too low, increase to > at least [262144]
Increase VM max map count to the respective value
sudo sysctl -w vm.max_map_count=262144Fix Git LFS Pointers issue
git lfs migrate import --no-rewrite "file_path" "file_path"
git lfs ls-files | grep "file_path"
git lfs push origin --all
git push origin --all
Basically, the first comand is to reimport back those files into pointer files in LFS, without writing the history. Do take note that you can include as many file_path as you can.
Next, the second command is to help us to check whether the file_path already been imported as Git LFS pointers files.
Lastly, we just need to push back the LFS files and the contents to the repository itself.
No Module named 'apt_pkg'
Method 1 - Install python-apt package
sudo apt-get install python-aptMethod 2 - Reinstall python3-apt package
sudo apt-get python3-apt --reinstallMethod 3 - Properly set .so file location
cd /usr/lib/python3/dist-packages
sudo cp apt_pkg.cpython-310-x86_64-linux-gnu.so apt_pkg.so
add-apt-repository unable to support jammy
cd /usr/lib/python3/dist-packages
sudo cp apt_pkg.cpython-310-x86_64-linux-gnu.so apt_pkg.so
Setup self-hosted GitHub runner
With self-hosted runners, you can create custom hardware configurations that meet your needs with processing power or memory to run larger jobs, install software available on your local network, and choose an operating system not offered by GitHub-hosted runners. — GitHub (opens in a new tab)
References
-
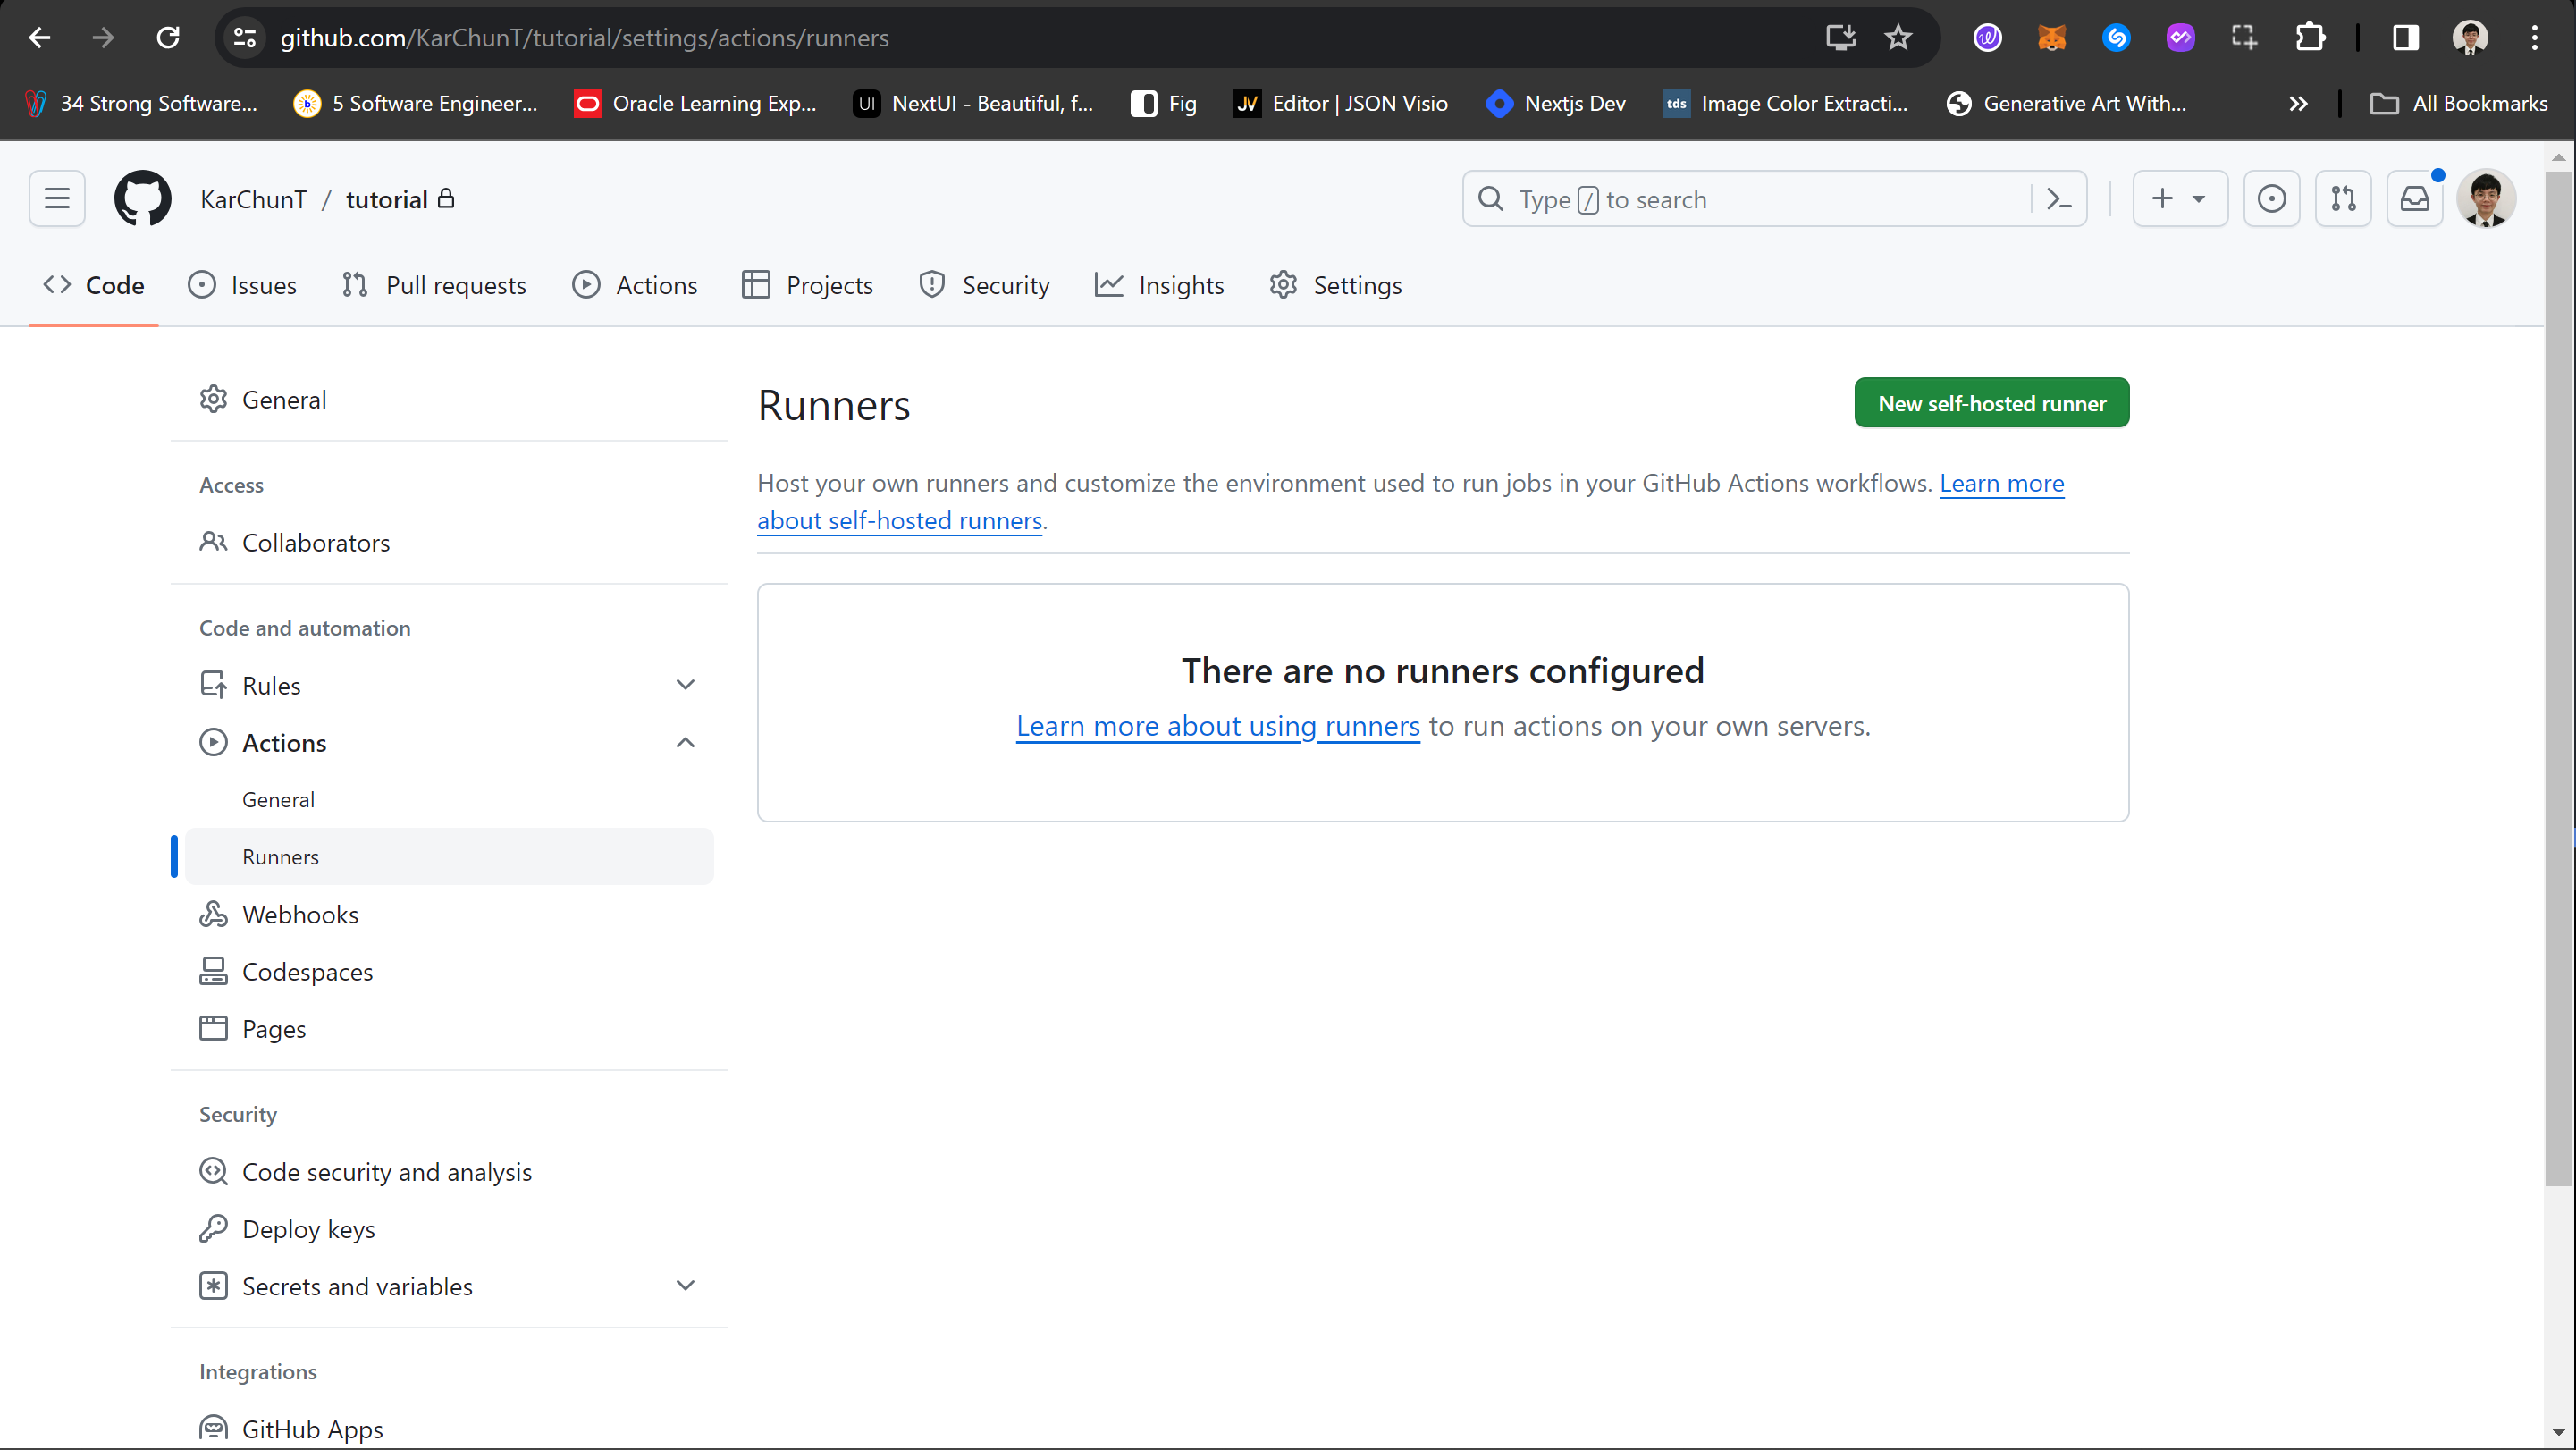
Go to your repository in GitHub.
-
In Settings > Actions > Runners, click on New self-hosted runner button.
-
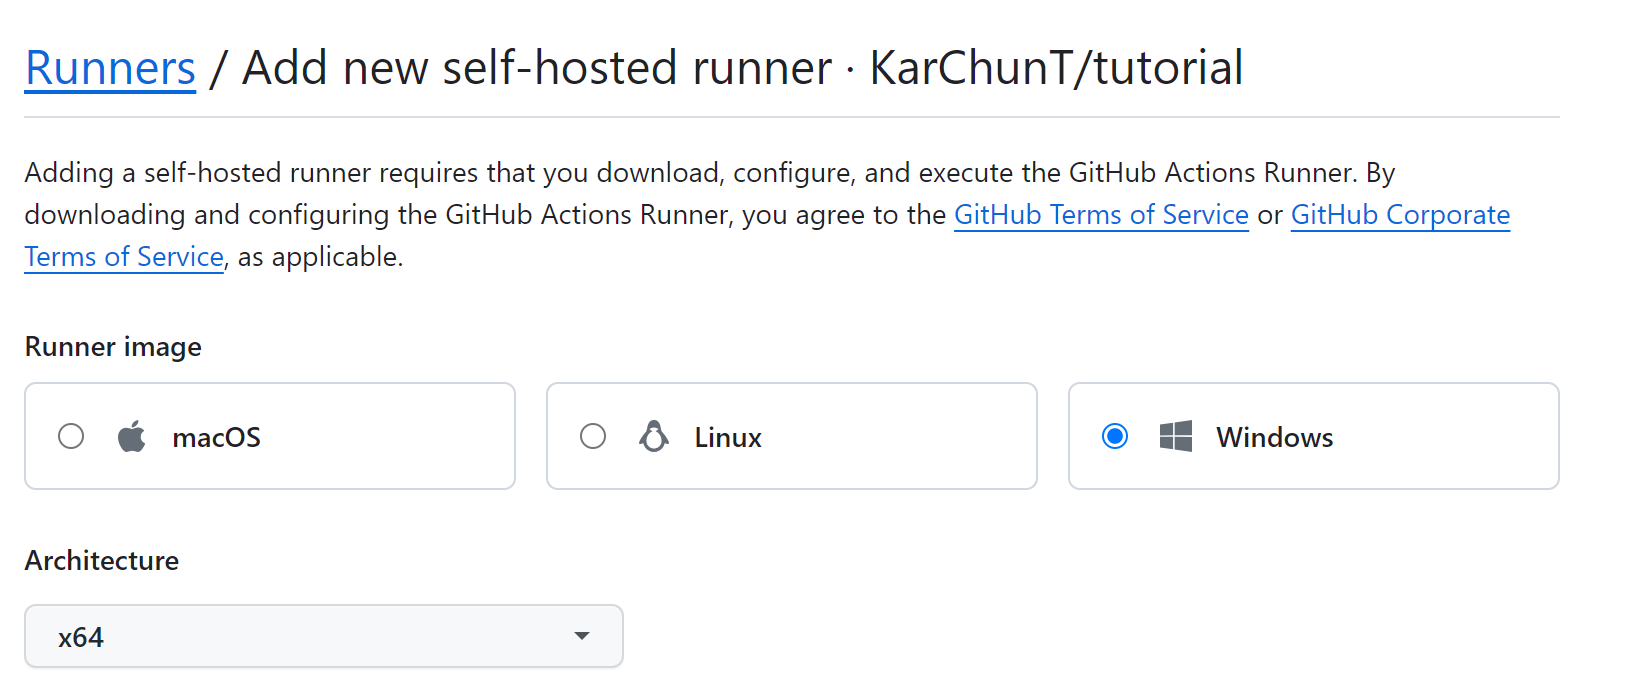
Choose Runner Image and Architecture. Do take note that, the architecture is based on your device specifications. For my case is x64.
-
Download the necessary files. You can find all these commands on the same page where you select Runner Image and Architecture.
Windows Runner
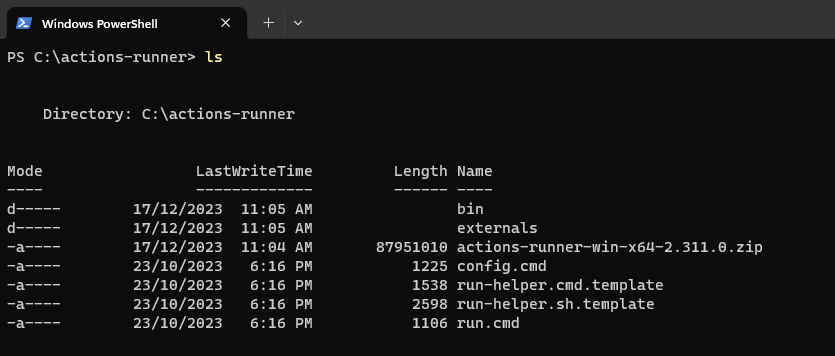
# Create a folder under the drive root
mkdir actions-runner; cd actions-runner

# Download the latest runner installer file
Invoke-WebRequest -Uri https://github.com/actions/runner/releases/download/v2.311.0/actions-runner-win-x64-2.311.0.zip -OutFile actions-runner-win-x64-2.311.0.zip

# Extract the installer
Add-Type -AssemblyName System.IO.Compression.FileSystem ; [System.IO.Compression.ZipFile]::ExtractToDirectory("$PWD/actions-runner-win-x64-2.311.0.zip", "$PWD")
Linux Runner
# Create a folderr under drive root
mkdir actions-runner && cd actions-runner

# Download the latest runner installer file
curl -o actions-runner-linux-x64-2.311.0.tar.gz -L https://github.com/actions/runner/releases/download/v2.311.0/actions-runner-linux-x64-2.311.0.tar.gz

# Extract the installer
tar xzf ./actions-runner-linux-x64-2.311.0.tar.gz
Here is the output after executing all these commands.
-
Configure and start the runner.
Windows Runner
# Configure the runner
./config.cmd --url <github-repo-url> --token <token> --labels <lists-of-label>

# Start the runner
./run.cmd
Linux Runner
# Configure the runner
./config.sh --url <github-repo-url> --token <token> --labels <lists-of-label>

# Start the runner
./run.sh
Programmatically assign labels (opens in a new tab) to a self-hosted runner is optional. Here is the sample configuration of the runner.
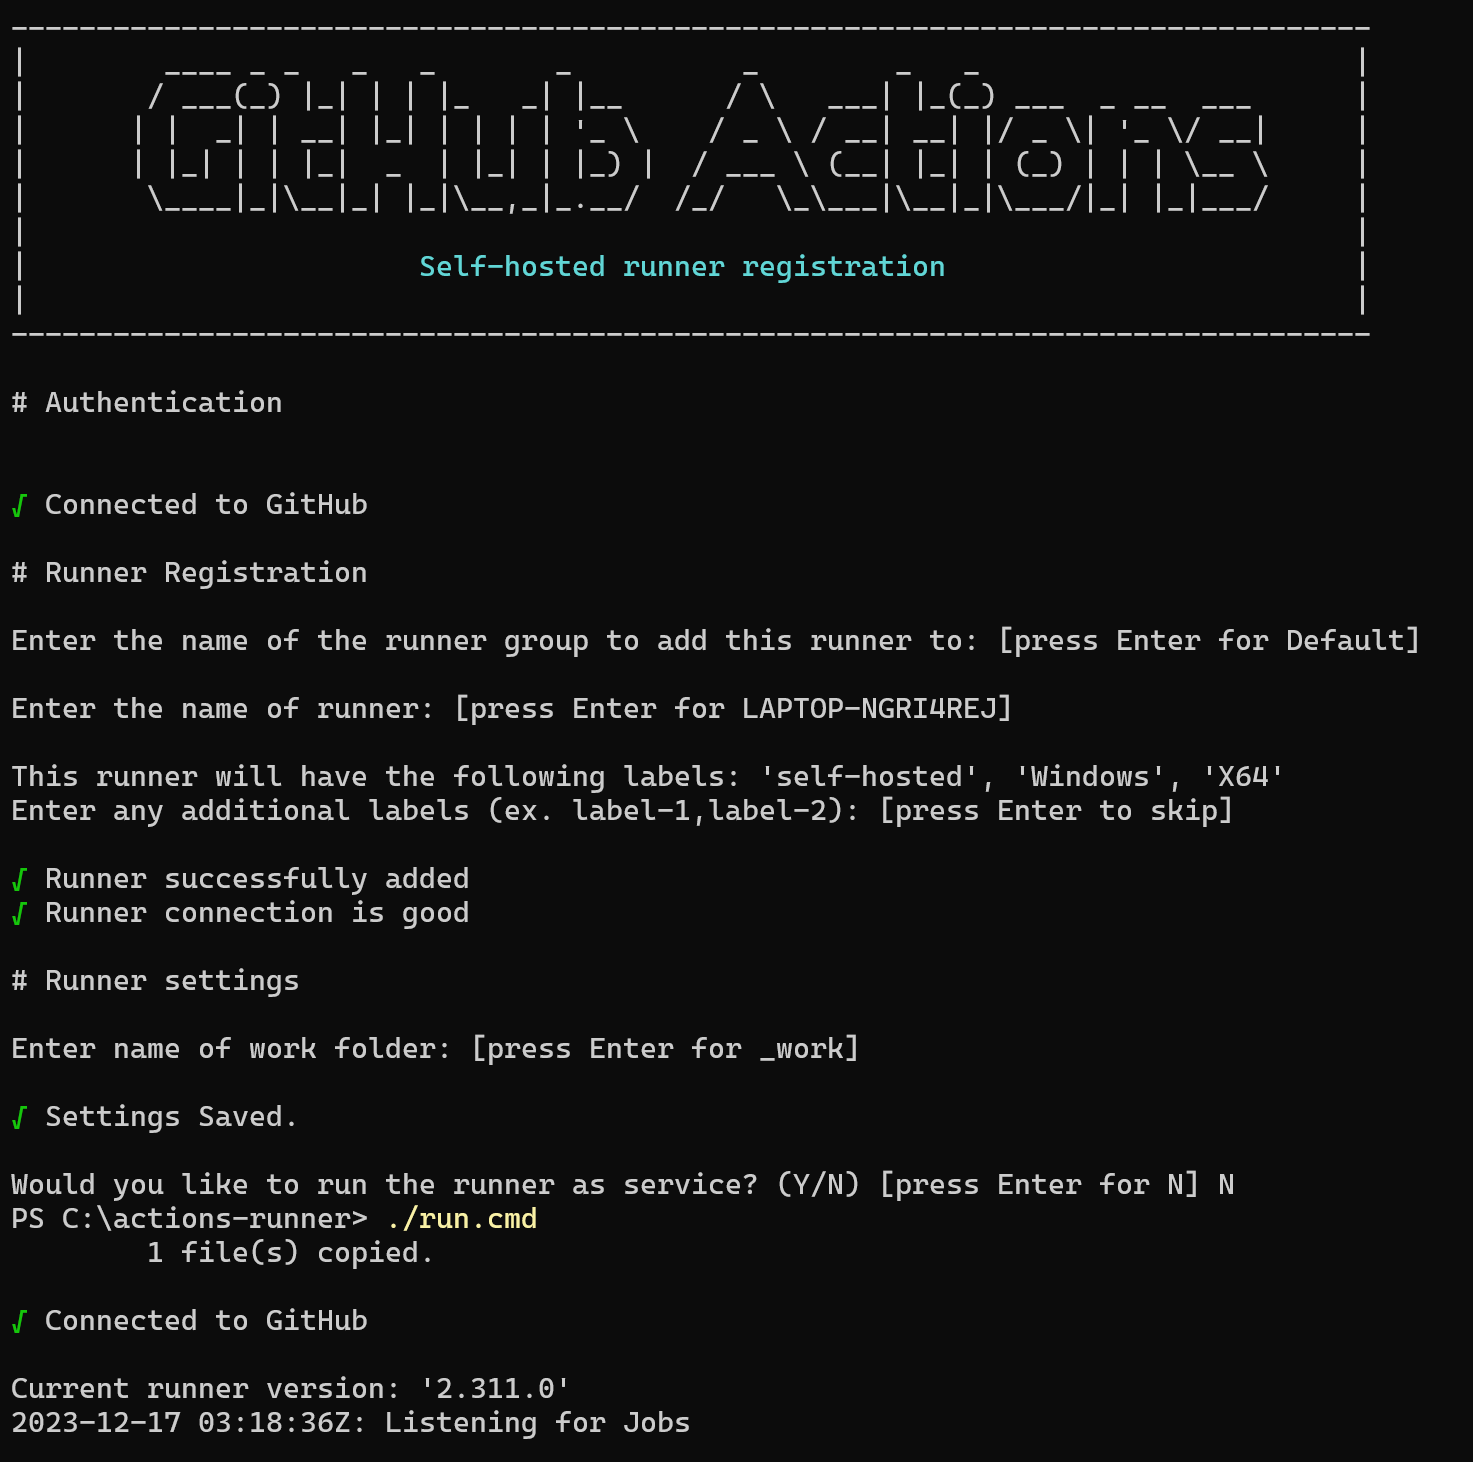
Verify your runner being setup.
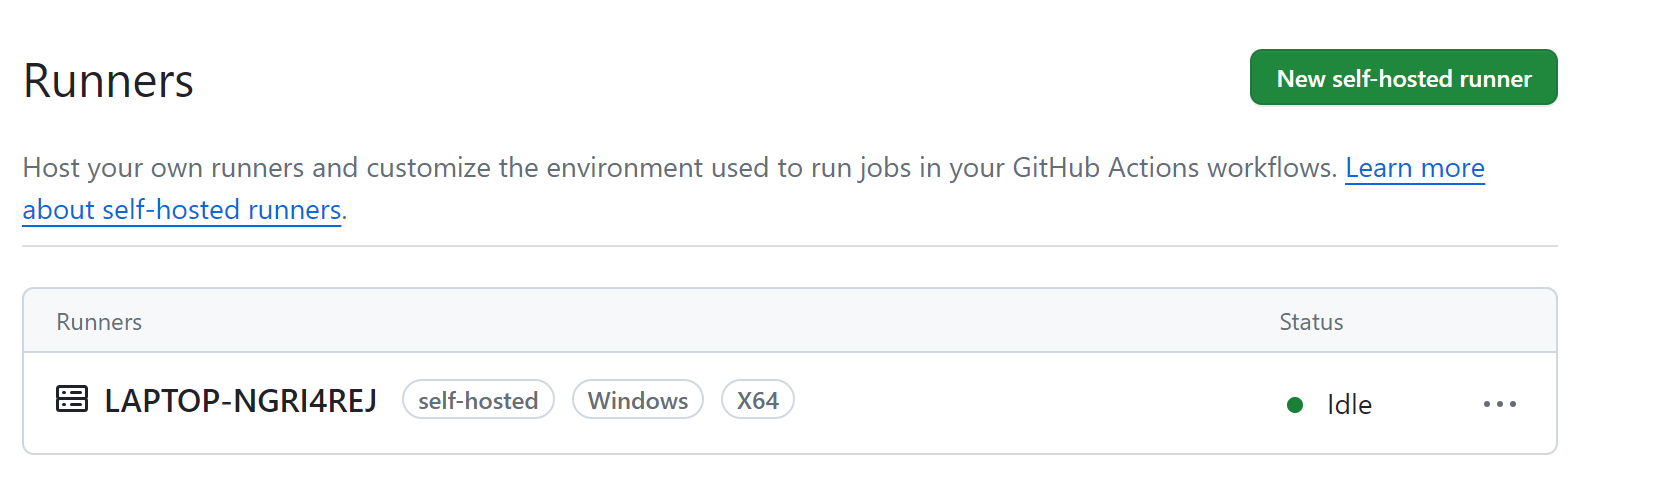
-
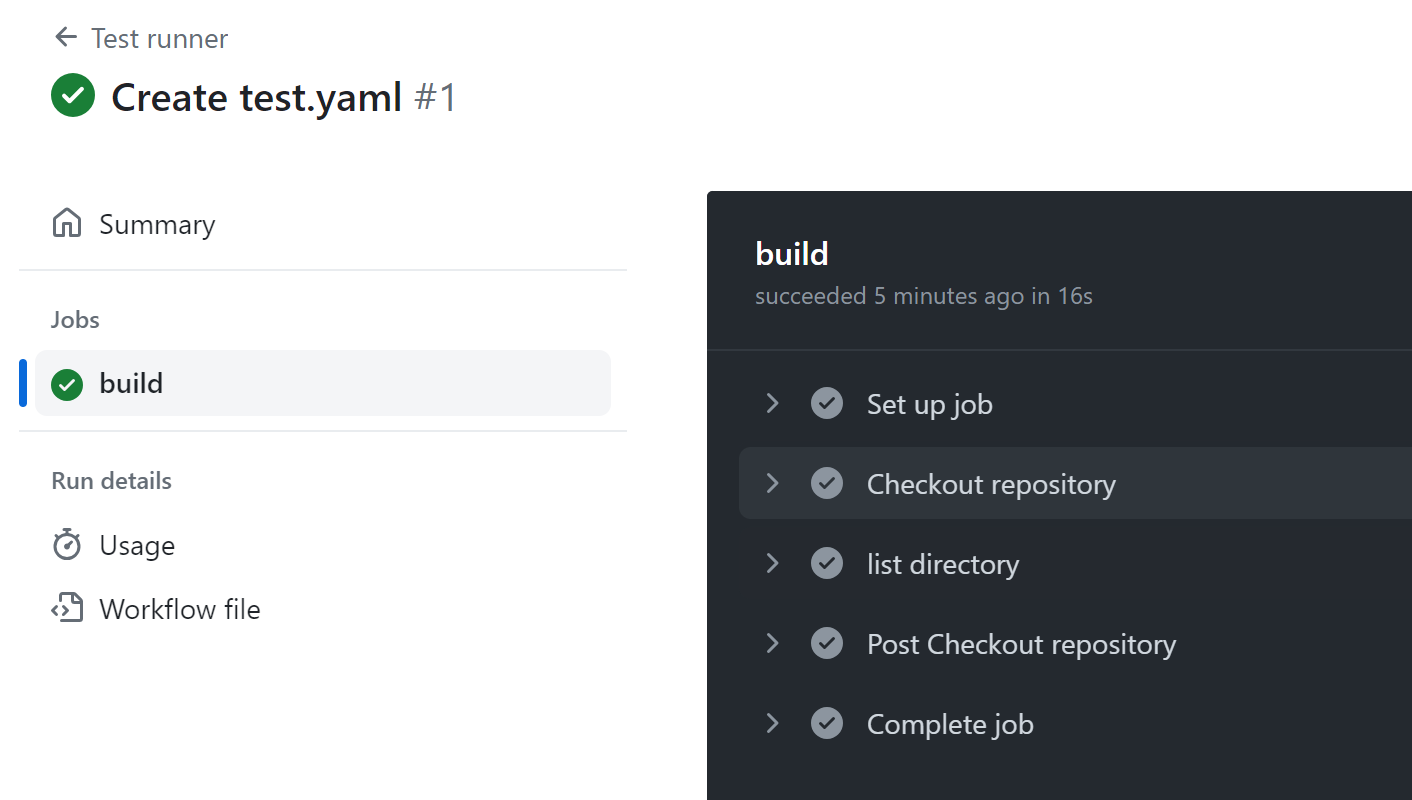
Using your self-hosted runner. Create a new file under
.github/workflows/test.yaml.name: Test runner on: push: jobs: build: runs-on: ["self-hosted"] steps: - name: Checkout repository uses: actions/checkout@v4 - name: list directory run: lsHere is the output after all the CI jobs are completed.
-
Optional: You can configure the self-hosted runner application as a service (opens in a new tab)
Setup k3s on Ubuntu
-
Install k3s as a service
curl -sfL https://get.k3s.io | sh - -
Fix k3s permission denied issues
mkdir ~/.kube 2> /dev/null export KUBECONFIG=~/.kube/config sudo k3s kubectl config view --raw > "$KUBECONFIG" chmod 600 "$KUBECONFIG"- More details (opens in a new tab) in fixing k3s permission denied issues.
-
export
KUBECONFIG=~/.kube/configto either~/.profileor~/.bashrcto make it persist on reboot(Optional).nano ~/.bashrc source ~/.bashrcNavigate to the last line
~/.bashrc# last line export KUBECONFIG=~/.kube/config -
Test connection
kubectl get all
Run sudo command without a password
-
Open
/etc/sudoerswithvisudoeditor, as if straight away edit/etc/sudoersfile with text editor, it won't validate the syntax.sudo visudo -
Append this line
username ALL=(ALL:ALL) NOPASSWD:ALLat the end of the/etc/sudoersfile/etc/sudoers# User privilege specification root ALL=(ALL:ALL) ALL # Members of the admin group may gain root privileges %admin ALL=(ALL) ALL # Allow members of group sudo to execute any command %sudo ALL=(ALL:ALL) ALL # See sudoers(5) for more information on "@include" directives: @includedir /etc/sudoers.d kc ALL=(ALL:ALL) NOPASSWD:ALL -
Open a new terminal window and test the command with root privileges
sudo apt-get update
Install Java with APT on Ubuntu
Documentation (opens in a new tab)
-
Update apt package
sudo apt update -
Install JRE
sudo apt install default-jre -
Verify Java installation
java -version -
Install Java JDK
sudo apt install default-jdk -
Verify Java JDK installation
javac -version
Install Java OpenJDK 17
-
Update apt package
sudo apt update -
Install OpenJDK and JRE 17
sudo apt-get install openjdk-17-jdk openjdk-17-jre -y -
Check Java Version
java -version
Install Maven (MVN)
-
Update apt package
sudo apt update -
Install Maven
sudo apt-get install maven -y -
Check Maven Version
mvn -version
Install latest Git
-
Install stable Git version
sudo add-apt-repository ppa:git-core/ppa sudo apt-get update sudo apt-get install git -
Check Git version
git --version
Install packages using deb file
-
Navigate to your deb file location
-
Install a .deb file
sudo dpkg -i <file-name>.deb
Install KubeVirt
-
Install KubeVirt operator
export VERSION=$(curl -s https://api.github.com/repos/kubevirt/kubevirt/releases | grep tag_name | grep -v -- '-rc' | sort -r | head -1 | awk -F': ' '{print $2}' | sed 's/,//' | xargs) echo $VERSION kubectl create -f https://github.com/kubevirt/kubevirt/releases/download/${VERSION}/kubevirt-operator.yaml -
Deploy KubeVirt Custom Resource
kubectl create -f https://github.com/kubevirt/kubevirt/releases/download/${VERSION}/kubevirt-cr.yaml -
Install Virtctl
ARCH=$(uname -s | tr A-Z a-z)-$(uname -m | sed 's/x86_64/amd64/')
curl -L -o virtctl https://github.com/kubevirt/kubevirt/releases/download/${VERSION}/virtctl-${VERSION}-${ARCH}
chmod +x virtctl
sudo install virtctl /usr/local/bin
Install Jenkins with Docker Compose
Dockerhub Jenkins (opens in a new tab)
-
Create docker-compose.yml
docker-compose.ymlversion: '3.8' services: jenkins: image: jenkins/jenkins:jdk11 restart: always privileged: true user: root ports: - '8081:8080' - '50000:5000' container_name: jenkins_jdk11 volumes: - ~/Desktop/self-hosted/jenkins_home:/var/jenkins_home - /var/run/docker.sock:/var/run/docker.sock- You can map
/var/jenkins_hometo any local location you liked
- You can map
-
Start docker-compose.yml as background
docker-compose up -d -
Verify Jenkins container service
docker-compose ps -
Get the Jenkins admin password
docker exec jenkins_jdk11 cat /var/jenkins_home/secrets/initialAdminPassword -
Open your browser, navigate to
localhost:8081, and paste your password
Share your local server with Ngrok
-
Sign up for Ngrok
-
[Optional] You can free claim 1 subdomain from Ngrok
-
Download ngrok packages based on your OS.
-
Unzip to install
tar -xvzf ngrok-v3-stable-linux-amd64.tgz -
[Optional] Copy to
/usr/local/bincp ngrok /usr/local/bin -
Connect your account
ngrok config add-authtoken <auth-token>- The auth-token saved to configuration file:
/home/<username>/.config/ngrok/ngrok.yml
- The auth-token saved to configuration file:
-
Start a HTTP tunnel forwarding to your local port 80
ngrok http 80 ngrok http --domain=<domain-name> 80 -
Go to your browser and type your domain name.
Use different Python version to setup Python virtual environment
Docs
# Linux
pip install virtualenv
virtualenv venv --python=/usr/local/bin/python
virtualenv venv --python=/usr/local/bin/python3

# Windows
##  Method 1 - I don't recommend to use virtualenv as it will have some missing files
pip install virtualenv
virtualenv venv -p `which python`
virtualenv venv -p `which python3`
virtual venv -p "C:\Users\karchunt\AppData\Local\Programs\Python\Python312\python.exe"

##  Method 2
"C:\Users\karchunt\AppData\Local\Programs\Python\Python312\python.exe" -m venv venv
Got permission denied while trying to connect to the Docker daemon socket at unix:///var/run/docker.sock
sudo chmod 666 /var/run/docker.sockNginx permission problem [nginx: [emerg] mkdir() "/var/cache/nginx/client_temp" failed (13: Permission denied)]
Reference (opens in a new tab)
This error typically occurs in alpine docker image. Since the nginx image already have a user called nginx. We will reuse it.
FROM nginx:alpine

RUN touch /var/run/nginx.pid \
   && chown -R nginx:nginx /var/cache/nginx /var/run/nginx.pid

COPY --chown=nginx:nginx <your-files> /usr/share/nginx/html
COPY --chown=nginx:nginx <your-nginx-config> /etc/nginx/conf.d/default.conf

USER nginx
...